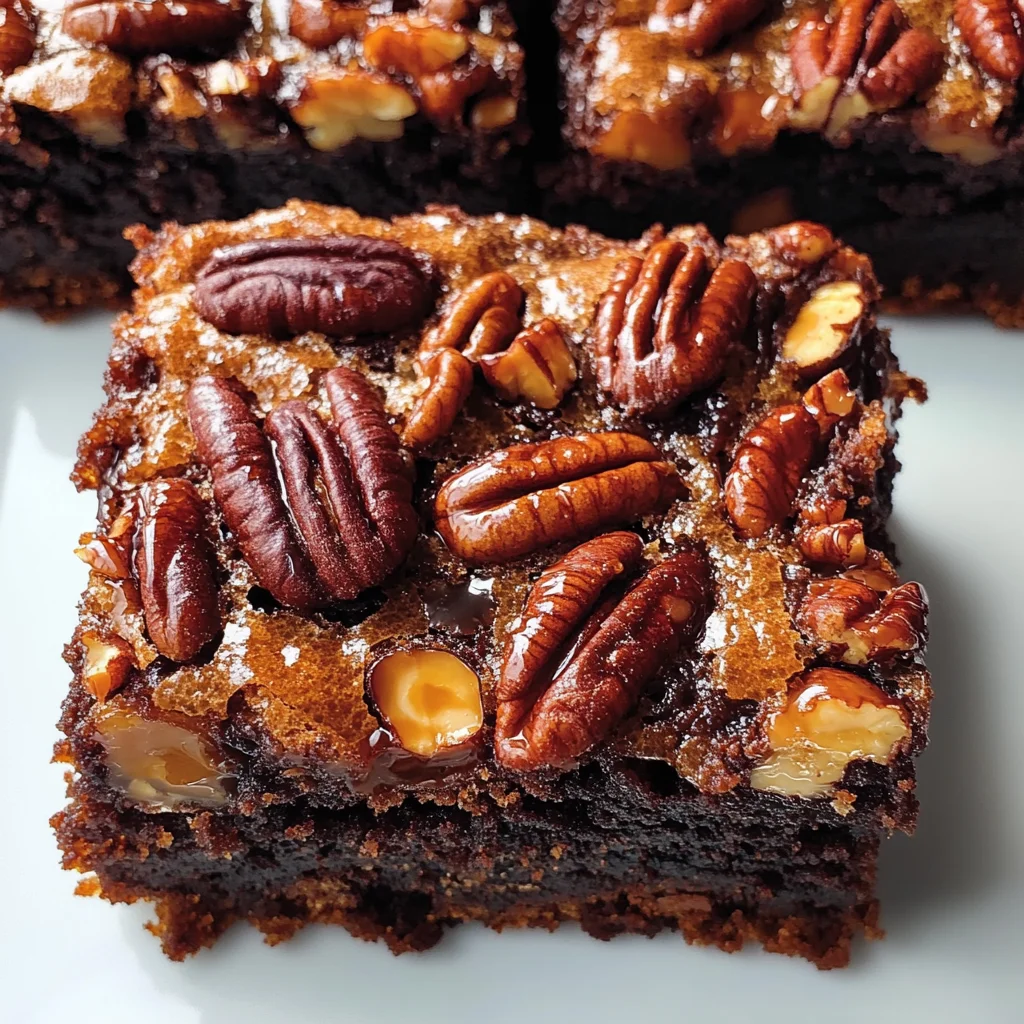
Gooey Black Bottom Pecan Pie Brownies
There’s something truly magical about the alchemy of baking, isn’t there? The way simple ingredients transform into a symphony of flavors, aromas, and textures is nothing short of enchanting. Today, I’m thrilled to share with you a recipe that embodies this magic in every bite: Gooey Black Bottom Pecan Pie Brownies. Imagine the rich embrace of dark chocolate brownies mingling with the sweet, nutty goodness of pecan pie—a dessert that feels both indulgent and comforting. Each slice is a journey through gooey layers, where chocolate lovers will find their hearts—and taste buds—swooning in delight.
Every time I make these brownies, it takes me back to moments spent in cozy kitchens filled with laughter and warmth. This recipe is more than just a sweet treat; it’s a bridge between traditions, merging my love for decadent chocolate with the classic pecan pie that has graced many holiday tables. Picture yourself sharing these luscious brownies with friends and family during gatherings or cozy nights in; they’re perfect for any occasion! Trust me when I say that each slice brings joy not just from its taste but from the stories and memories woven into every bite.
Gooey Black Bottom Pecan Pie Brownies: A Decadent Delight
These Gooey Black Bottom Pecan Pie Brownies are an irresistible fusion of two beloved desserts, crafted to create an experience that will linger long after the last crumb has been devoured. The combination of fudgy brownie texture paired with a caramelized pecan topping results in a dessert that’s rich yet somehow manages to feel light on your palate. I can almost hear the applause of my friends as they take their first bites! So let’s roll up our sleeves and embark on this delightful culinary journey together.
Ingredients:
Before we dive into baking bliss, let’s gather our star ingredients! Each plays a crucial role in crafting the divine layers of flavor and texture in our Gooey Black Bottom Pecan Pie Brownies. Here’s what you’ll need:
- 2 18.3 oz boxes brownie mix (dark chocolate or fudge). Choosing a high-quality brownie mix is paramount—it sets the foundation for that rich, fudgy layer we crave. Dark chocolate mixes provide an intense flavor that perfectly balances the sweetness of the pecan topping. If you want to go from scratch instead, I promise you can whip up homemade brownies with cocoa powder and melted chocolate for even deeper flavor! Just remember, we want that ultimate gooeyness here!
- Ingredients required for brownies (eggs, oil, water). While each mix has specific requirements listed on its box—usually eggs, oil, and water—it’s essential to follow these exactly so you get those heavenly brownies at just the right consistency. Eggs lend moisture and structure; oil helps keep things fudgy while preventing them from drying out; water activates everything beautifully.
- 1 cup dark brown sugar (packed). This beautiful sugar adds depth to our pecan layer with its complex molasses flavor. The richness it brings not only enhances sweetness but also contributes to that lovely chewy texture we desire in our topping. When packing it down into your measuring cup, imagine it as little grains of treasure waiting to add richness to your dessert!
- 1/4 cup butter (softened). Butter is non-negotiable here; it’s what gives our pecan topping its creamy richness while enhancing flavors across the board. Make sure your butter is softened—this means leaving it at room temperature until it feels like a pillow—so it creams beautifully with sugar for a smooth consistency.
- 1 1/2 cups light corn syrup. This syrup acts as liquid gold in our pecan layer! It’s essential for achieving that glossy finish while binding everything together as it bakes into soft caramel goodness. Light corn syrup keeps everything sweet but won’t overpower other flavors; if you’re seeking alternatives due to dietary needs, consider using agave nectar or maple syrup!
- 4 large eggs. Eggs play multiple roles—they provide structure and stability while helping bind all those glorious ingredients together. They impart moisture as well and contribute to that custardy filling we’re after in the pecan topping. Always use large eggs unless specified otherwise!
- 1 tsp vanilla extract. Vanilla is like the secret handshake of baking; it elevates everything else around it! This single teaspoon adds warmth and complexity to our signature flavors without stealing the spotlight.
- 1/4 tsp salt. Don’t overlook this tiny but mighty ingredient! Salt enhances sweetness by balancing flavors—it draws out all those beautiful notes from both chocolate and pecans.
- 1/4 tsp cinnamon. That warm hint of spice adds another layer of complexity; cinnamon has a way of making desserts feel cozy and inviting! Just think about how perfectly it pairs with both chocolate and nuts—pure magic!
- 2 1/2 cups pecans (chopped). Pecans are undoubtedly the stars of our topping! Their buttery crunch contrasts beautifully against the gooey brownie base while infusing every bite with nutty richness. Look for fresh nuts without any bitterness—the fresher they are, the more pronounced their flavor will be!
Equipment You’ll Need:
Now that we’ve gathered our ingredients, let’s talk tools! Having the right equipment makes all the difference when creating these mouthwatering brownies—it can turn a good baking session into an extraordinary one filled with joy.
- Mixing bowls – versatile companions for blending ingredients together smoothly without making too much mess! Opt for glass or stainless steel over plastic because they handle heat better if you’re melting butter or mixing wet ingredients directly after heating them up slightly on stovetops before combining everything else together!
- Hand or stand mixer – trusty allies when creaming butter and sugar effortlessly until light and fluffy! If you don’t own one yet (you should consider investing), whisking by hand works too—but be ready for an arm workout!
- Measuring cups/spoons – precision is key when baking anything deliciously decadent like these brownies! Accurate measurements ensure consistent results every time (think about those layers we’re building!).
- Spatula – indispensable for scraping down sides of bowls ensuring no precious batter gets left behind during mixing stages—you’ll thank me later when you’re licking off remnants from this tool instead of wasting any yummy goodness stuck inside corners!
- 9×13-inch baking pan – this size provides ample space for your brownie base plus allows enough room for pouring over creamy toppings without overflowing edges while baking away in all its glory! Choose glass or metal pans depending on oven preferences since they conduct heat differently (metal pans often yield crispier edges!).
With these tools at your side, you’ll be well-equipped to create some truly magical desserts!
Preparing the Gooey Black Bottom Pecan Pie Brownies
Step 1: Prepare Your Brownie Base
First things first: let’s get those brownies started because they are going to be absolutely heavenly once baked! Preheat your oven according to your brownie mix instructions—usually around 350°F (175°C) does wonders here—while greasing or lining your chosen baking pan so nothing sticks later on (trust me; you don’t want sticky surprises!). Then grab your two boxes of brownie mix along with whatever additional dry ingredients they require—usually eggs, oil, and water—and combine them according to package directions until you’ve achieved a smooth batter full of rich chocolatey goodness.
Once mixed thoroughly but don’t rush through this step—I recommend folding gently using spatulas instead of mixers—to preserve airiness within those lovely bubbles created during blending processes which help create lighter textures overall during baking times ahead! Pour half this luscious mixture into prepared pan evenly spread out across bottom surface before sliding them into preheated ovens where they’ll bake away joyfully between 25–30 minutes until they’re not entirely set but still slightly undercooked at center point—that’s how we’ll achieve this delightful gooeyness later on!
Step 2: Crafting That Irresistible Pecan Topping
While those beauties are baking away happily in their warm homey environment—a scent that’ll wrap around you like a warm hug—we’ll prepare our fabulous pecan topping next so it’s ready when browning times come around shortly after! Grab another mixing bowl along with softened butter and packed dark brown sugar then cream them together using hand or stand mixer until creamy perfection emerges right before eyes—it should look fluffy yet cohesive which means all flavors have begun mingling beautifully already.
Now one-by-one add remaining ingredients: corn syrup followed by eggs then vanilla extract alongside salt & cinnamon ensuring thorough incorporation happens throughout mixing process—that means no clumps left behind because each bite must pack maximum flavor punch possible later on upon digging forks into final dessert presentation post-baking adventures! Once mixed completely thanks again check consistency carefully—it should resemble thick custard-like texture which promises incredible results ahead when poured atop slightly underbaked brownie base waiting patiently below!
Step 3: Marrying Chocolate & Pecans
After allowing brownies enough time basking under oven warmth (remember visual cues shared earlier!), pull them out carefully letting aroma swirl around kitchen inviting everyone nearby closer towards deliciousness soon-to-be served; don’t forget oven mitts though—as hot surfaces can surprise even seasoned bakers sometimes too quickly if we’re not careful enough here folks!
Once removed allow cooling down briefly just enough so handling becomes easier thereafter pour prepared pecan mixture directly over top gently spreading evenly across entire surface without disturbing brownie base underneath much—it’s okay if some rises through center part slightly; that’s what creates intriguing layered visuals once baked fully later on! With toppings distributed harmoniously atop chocolaty canvas now ready head back into oven where they’ll join forces again cooking away an additional 40 minutes until centers appear almost set yet barely jiggle still signifies final stage approaching soon before cooling begins taking place afterward before cutting pieces generously sized servings destined delight everyone gathered around table eagerly awaiting indulgence moments shared together especially once showcasing beauty presented aesthetically pleasing shapes freshly cut squares revealing gooey interiors hiding beneath surfaces promising treasures discovered within each bite taken…
Step 4: Allow Time For Cooling Before Cutting
This step might seem tricky since waiting can be tough—but trust me here when I say patience pays off immensely regarding final textures enjoyed during tasting experiences ahead following cooling times needed beforehand where friends gather ’round enjoying stories swapped reminiscing fondly shared memories exchanging laughter amongst bites taken savoring delicacies revealed beneath layers showcasing artistry displayed throughout entire creation process leading towards finished product culminating success achieved beyond expectations set forth initially upon starting adventure altogether—it feels absolutely rewarding indeed knowing effort put forth translates tangible outcomes resulting joyous reactions occurring naturally amongst playful exchanges unfolding joyously whilst sharing delectable treats prepared lovingly within kitchens crafted carefully made special occasions celebrated warmly bonding hearts connecting through culinary delights offered freely shared throughout lives lived together intertwined blissfully harmonizing flavors found flowing seamlessly reciprocally experienced through food enjoyed collectively relishing moments passed lingering sweetly forever cherished fondly remembered long after plates cleared away leaving smiles brightening faces surrounding tables gathered close reflecting warmth shared uniting souls strengthened friendships enduring lovingly nurtured over years spent creating memories meant last lifetimes…
And there you have it—the path paved toward creating irresistibly delightful Gooey Black Bottom Pecan Pie Brownies awaits you now filled endless possibilities waiting unfold excitedly revealing stories told passionately shared among loved ones gathered near… Enjoy each moment savored along way knowing results guaranteed ultimately lead happiness spread infinitely throughout lives enriched deliciously touched hearts sparked dreams ignited inspired adventures undertaken boldly pursuing joy found hidden treasures found within delightful experiences awaiting discovery eagerly anticipated arriving atop plates adorned elegantly presented beautifully enhancing celebrations unfolding magnificently inspiring connections formed lasting legacies fulfilling nourishing souls feeding spirits uplifting minds… Happy baking dear friend!!
Baking Your Perfect Gooey Black Bottom Pecan Pie Brownies
Step 5: The Magic of Layering
Now that you’ve got your brownies baked to a tantalizingly fudgy state, it’s time to elevate them with the pecan pie topping! This step is where the true magic happens, and trust me, it’s absolutely paramount for achieving that gooey texture we all crave. When your brownies come out of the oven after about 25 to 30 minutes, they should be set around the edges but still soft in the center. You want them to look slightly underbaked—that’s the secret to achieving that rich, decadent foundation for our pecan topping. As you pour the pecan mixture over these glorious brownies, make sure to gently spread it evenly across the surface. Don’t worry if some of that luscious brownie batter bubbles up through the pecan mix; this will only add to the dessert’s character and flavor!
Now, let’s talk about why this layering is so crucial. The gooeyness from the brownie base and the syrupy pecan filling harmonize beautifully as they bake together. The brown sugar in our pecan mixture melts down into a syrupy goodness, while the eggs help bind everything together into a cohesive topping that sets perfectly over those fudgy brownies. So take a moment to appreciate this step—it’s where two beloved desserts collide in a symphony of flavors!
Step 6: Baking with Love
Once you’ve poured your pecan pie mixture atop those beautifully underbaked brownies, it’s time to slide this masterpiece back into the oven for an additional 40 minutes. During this time, I urge you not to rush; this is when all those delightful flavors meld together into something truly extraordinary. As your dessert bakes, keep an eye on it—your kitchen will fill with an utterly intoxicating aroma of caramelized sugar and toasted pecans that will make your heart skip a beat.
To ensure you achieve that perfect texture, you’ll want to check for doneness by gently jiggling the pan after about 35 minutes. The center should be set but still have a slight jiggle—this indicates there’s just enough moisture left inside for that gooey consistency we crave. If it looks too liquidy, give it another few minutes in the oven; remember, we want it barely set, not fully cooked! This delicate balance is what creates those unforgettable layers of flavor and texture.
Step 7: Patience is Key
Once your brownies have finished baking and are looking gloriously golden-brown with hints of bubbling syrup peeking through, resist the urge to dig in right away! I know it’s tempting—the warm scents wafting through your kitchen are simply irresistible—but trust me on this one; cooling is crucial for getting clean cuts and allowing those layers to settle properly. Let them cool at room temperature for at least an hour before attempting to slice into them.
This resting period allows the flavors to deepen and meld even further while also giving any residual heat time to finish setting those gooey layers just right. Additionally, cooling helps avoid those heartbreaking moments when your first slice pulls apart instead of cutting cleanly—nobody wants a messy presentation when serving delicious brownies! So grab a cup of tea or coffee during this wait; I promise you, each minute will be worth it when you finally get to take that first heavenly bite.
Step 8: The Art of Slicing & Serving
With patience comes reward! After allowing your Gooey Black Bottom Pecan Pie Brownies to cool completely—trust me on this—you’re ready for slicing. Use a sharp knife for clean cuts; I recommend running it under hot water then drying it off before making each cut. This small technique works wonders—it warms up the blade just enough so that it glides effortlessly through those layers instead of dragging or tearing them apart.
When you’re ready to serve these beauties, consider garnishing with a dusting of powdered sugar or perhaps a dollop of whipped topping made from coconut cream if you’re feeling adventurous! Each bite promises an explosion of chocolatey richness combined with crunchy pecans and sweet syrupy goodness that will have everyone swooning at the very first taste. And as you present these decadent treats to friends and family—or maybe just yourself because who could resist?—remember that every layer tells a story crafted with love and care.
So here you have it! Your very own batch of Gooey Black Bottom Pecan Pie Brownies awaits—a dessert that marries two classic favorites into one unforgettable experience. Enjoy every moment as you share these delights; they’re perfect for gatherings or simply as an indulgent treat after dinner!
Storage and Enjoyment Tips for Your Gooey Black Bottom Pecan Pie Brownies
Now that you’ve created this delightful masterpiece of gooey goodness, it’s time to revel in the joy of sharing or savoring these Gooey Black Bottom Pecan Pie Brownies all on your own! Whether you’re planning a gathering or just treating yourself, knowing how to store these decadent treats will enhance your experience. The best part? These brownies not only taste exquisite right out of the oven but also benefit from a little time in the fridge or even the freezer!
Storing Leftover Gooey Black Bottom Pecan Pie Brownies
To keep your brownies fresh and delicious, I highly recommend storing them in an airtight container. This helps seal in that rich, fudgy flavor while preventing any unwanted moisture from spoiling their delightful texture. If you’ve got some leftover (and trust me, it’s hard to resist eating them all at once!), they can be kept at room temperature for about 2-3 days. However, for optimal freshness, storing them in the fridge is non-negotiable; they’ll stay tasty for up to a week! A little pro tip: if you want to maintain that perfect chewiness, place a slice of bread into the container with your brownies. The bread will absorb excess moisture, ensuring each bite remains soft and utterly intoxicating. And if you’re wondering how they taste after storage, let me assure you—they become even more luscious as the flavors meld together! When you’re ready to enjoy them again, just pop one in the microwave for 10-15 seconds to bring back that freshly baked warmth.
Freezing Gooey Black Bottom Pecan Pie Brownies for Later
If you’re looking to extend the life of these heavenly brownies even further, freezing is an absolute game-changer! To freeze properly, first let your brownies cool completely—this step is crucial because it prevents ice crystals from forming. Afterward, wrap them tightly in plastic wrap or aluminum foil before placing them in a freezer-safe bag or container. They can be kept frozen for up to three months without compromising their decadent profile! When you’re ready to indulge again, simply take out the desired amount and let them thaw in the fridge overnight or at room temperature for a couple of hours. The convenience factor here is fantastic; imagine having a batch of these gooey delights waiting for you whenever a chocolate craving strikes! Whether it’s an impromptu gathering or just a cozy night in with some warm tea, these brownies will always be there to brighten your day.
Gooey Black Bottom Pecan Pie Brownies
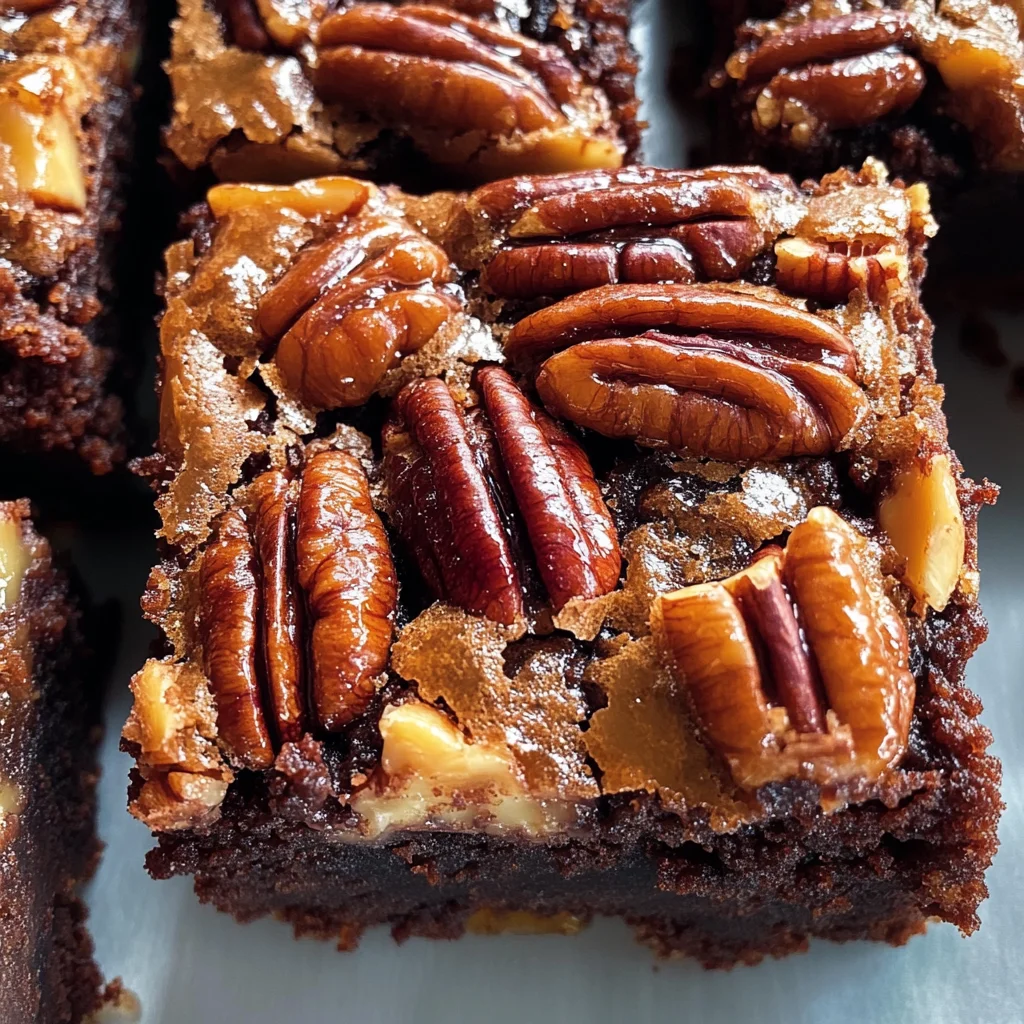
Indulge in the delightful world of Gooey Black Bottom Pecan Pie Brownies, where rich chocolatey goodness meets the sweet, nutty crunch of pecans. This dessert combines the best elements of fudgy brownies with a luscious pecan pie topping, creating a symphony of flavors and textures that will leave you craving more. Perfect for gatherings or cozy nights in, these brownies are bound to become a cherished favorite. Each slice offers a gooey center with a crisp topping that is both comforting and indulgent, making them ideal for any occasion.
- Prep Time: 15 minutes
- Cook Time: 70 minutes
- Total Time: 1 hour 25 minutes
- Yield: About 24 servings 1x
- Category: Dessert
- Method: Baking
- Cuisine: American
Ingredients
- 2 boxes dark chocolate brownie mix
- Eggs, oil, and water (as required by brownie mix)
- 1 cup dark brown sugar
- 1/4 cup softened butter
- 1 1/2 cups light corn syrup
- 4 large eggs
- 1 tsp vanilla extract
- 1/4 tsp salt
- 1/4 tsp cinnamon
- 2 1/2 cups chopped pecans
Instructions
- Preheat your oven to 350°F (175°C) and grease or line a 9×13-inch baking pan.
- Prepare the brownie mix according to package instructions and pour half of the batter into the prepared pan.
- In a separate bowl, cream together butter and dark brown sugar until fluffy. Add corn syrup, eggs, vanilla, salt, and cinnamon; mix until combined.
- Pour the pecan mixture over the partially baked brownie layer and spread evenly.
- Bake for an additional 40 minutes until set but slightly jiggles in the center.
- Allow to cool completely before slicing into squares.
Nutrition
- Serving Size: 1 square (50g)
- Calories: 220
- Sugar: 18g
- Sodium: 150mg
- Fat: 10g
- Saturated Fat: 3g
- Unsaturated Fat: 7g
- Trans Fat: 0g
- Carbohydrates: 31g
- Fiber: 2g
- Protein: 3g
- Cholesterol: 45mg