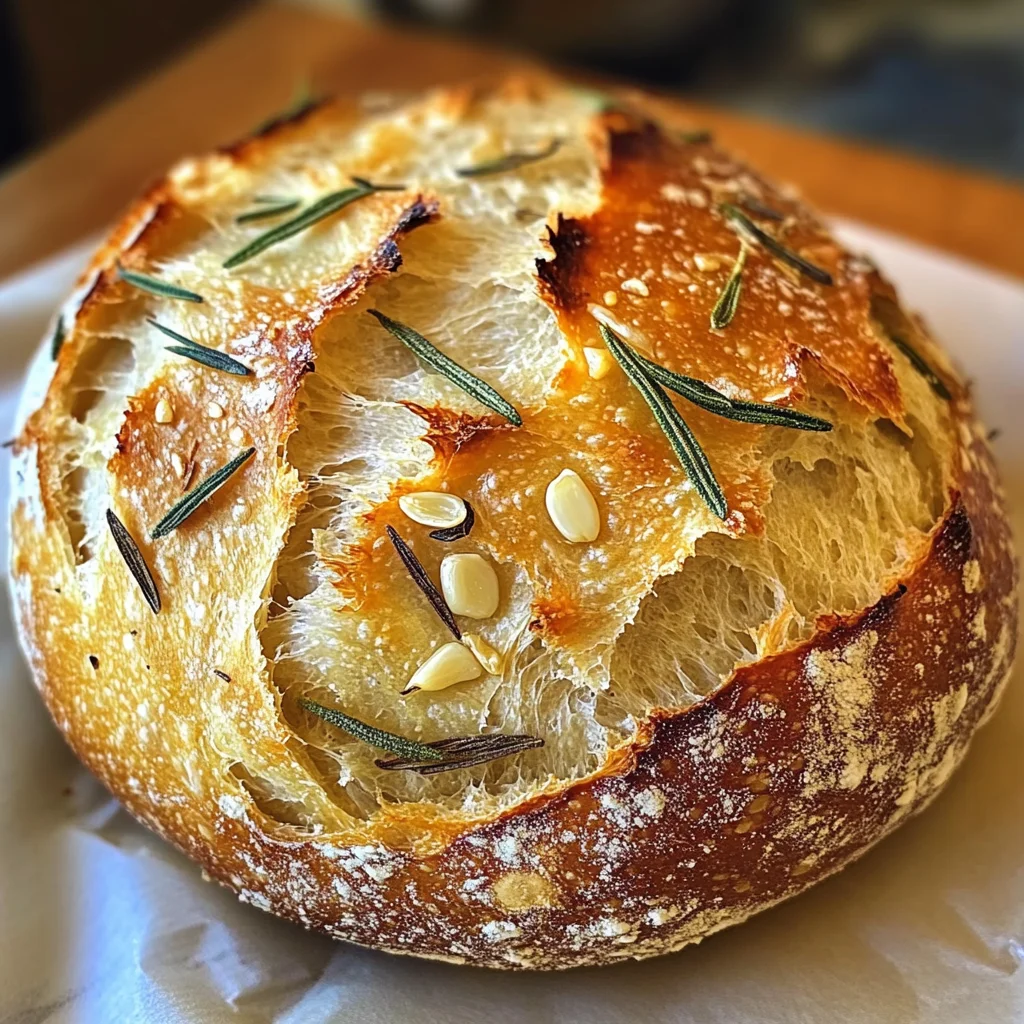
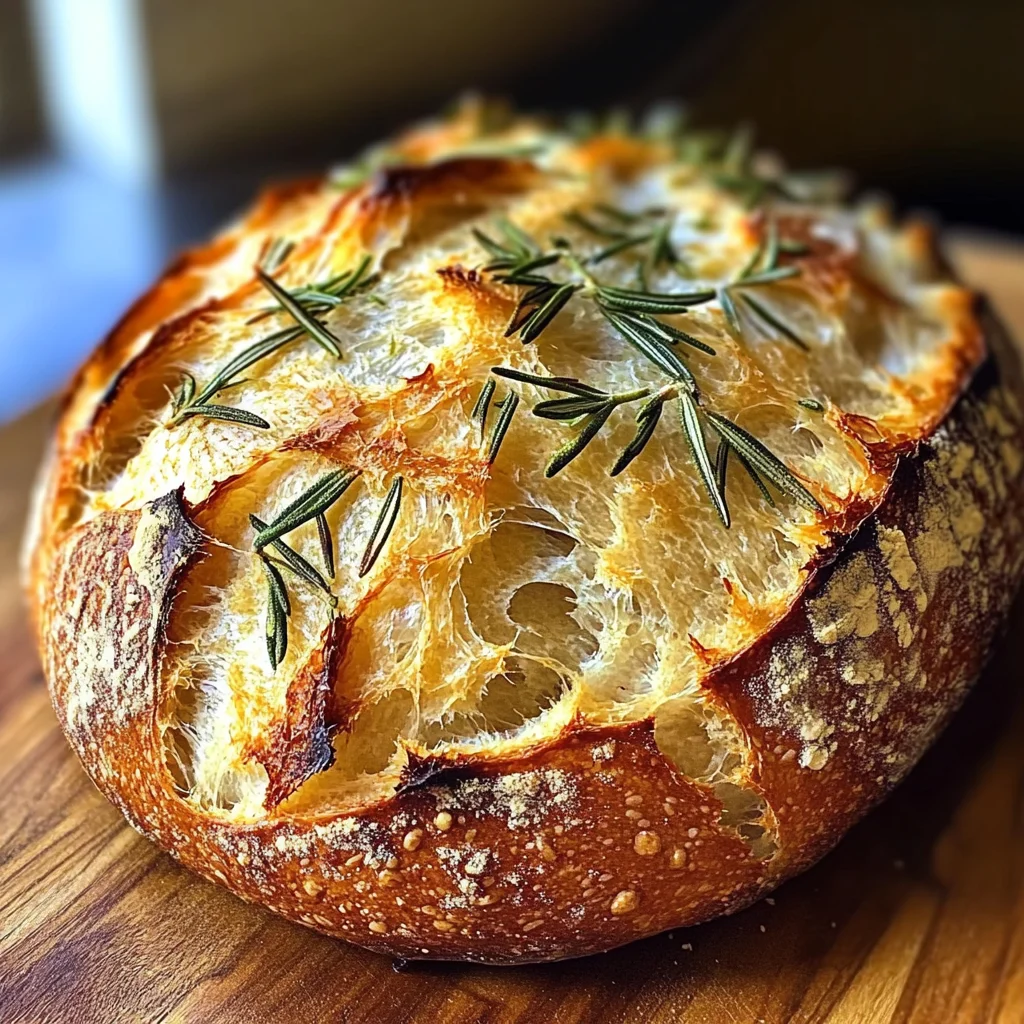
Rosemary & Roasted Garlic Artisan Bread
Indulge in the warm, aromatic experience of Rosemary & Roasted Garlic Artisan Bread, a delightful addition to any meal. This no-knead recipe is not just about baking bread; it’s about creating an experience that envelops your home in comforting aromas and nourishes your soul. Imagine the fragrant essence of fresh rosemary mingling with the sweet richness of roasted garlic, wafting through your kitchen as you prepare this crusty yet chewy loaf. It’s a culinary embrace that beckons family and friends to gather around the table, whether it’s for a cozy weeknight dinner or a festive family gathering. With minimal effort and just a handful of simple ingredients, you can create something truly extraordinary that will impress even the most discerning palates.
What makes this Rosemary & Roasted Garlic Artisan Bread so special is its simplicity combined with depth of flavor. The beauty of this recipe lies in its ability to transform humble ingredients into something magical. By roasting the garlic, you unlock its natural sweetness, softening its sharpness and adding a layer of complexity. Fresh rosemary provides a fragrant lift, making each bite fragrant and enjoyable. This bread isn’t just for slathering butter on; it lends itself perfectly to dipping in olive oil or pairing with hearty soups and stews—it’s a versatile staple that complements countless meals. Trust me when I say, once you’ve made this bread, you’ll find yourself returning to it time and again as your go-to recipe for comfort and warmth.
Rosemary & Roasted Garlic Artisan Bread: A Warm Hug in Every Slice
Let’s embark on this culinary journey together! Making Rosemary & Roasted Garlic Artisan Bread is an adventure filled with delightful aromas and satisfying textures. Whether you’re an experienced baker or just starting out, I promise you that the joy of creating this beautiful loaf will be worth every moment spent in the kitchen. So roll up your sleeves, gather those ingredients, and let’s make some magic happen!
Ingredients:
As we dive into the ingredient list for this luscious artisan bread, remember that each component plays a vital role in achieving that perfect balance of flavor and texture. Let’s explore what makes these ingredients so essential for our lovely loaf.
- 1 head garlic: Ah, garlic—the star of our show! When roasted, it transforms from pungent to sweet and mellow, infusing our bread with an utterly intoxicating flavor profile. Choosing a firm head with tight skin is key; look for bulbs that feel heavy for their size. The magic happens when we roast it—this process caramelizes the sugars in the garlic, resulting in a rich depth that elevates our artisan bread from ordinary to extraordinary.
- Extra-virgin olive oil: This liquid gold brings not only moisture but also enhances the flavor profile of our bread beautifully. Opt for high-quality extra-virgin olive oil; it has a robust taste and health benefits that refined oils lack. Olive oil contributes to a tender crumb while adding richness that complements both the rosemary and garlic magnificently.
- Coarse sea salt: Salt isn’t just for seasoning; it’s essential for enhancing flavors in bread-making. Coarse sea salt helps control fermentation by slowing down yeast activity slightly, allowing deeper flavors to develop during rising. When selecting salt, aim for unrefined varieties—they add more than just saltiness; they bring complexity.
- Freshly ground black pepper: Just imagine those tiny specks adding subtle warmth to each slice! Freshly ground pepper has more intense flavor than pre-ground varieties—this elevates our artisan bread significantly because we want every bite to be bursting with personality!
- 1½ cups water (room temperature): Water is crucial for activating our yeast while providing hydration for gluten development within our dough—this is paramount because it ensures we achieve that chewy texture we crave in artisan bread. Room temperature water is ideal because it allows yeast to wake up gently without shocking them into action.
- 1 teaspoon active dry yeast: Yeast is like little magic workers—they ferment sugars in our dough to produce carbon dioxide bubbles that make our bread rise beautifully! Be sure to check expiration dates when purchasing; fresh yeast equals better results!
- 3 cups bread or all-purpose flour: Flour is the backbone of any good bread recipe! Bread flour has higher protein content than all-purpose flour which ultimately leads to better gluten formation—resulting in that desired chewy texture we love so much! If you’re using all-purpose flour instead, don’t worry—it’ll still yield delicious results!
- ½ teaspoon dried oregano: Oregano adds another layer of flavor without overwhelming our primary ingredients; think of it as a supporting actor enhancing the lead’s performance! Dried oregano infuses warmth and earthiness into each bite—a wonderful complement to both rosemary and garlic.
- 1 teaspoon kosher salt: Kosher salt helps achieve balance by enhancing all flavors present without being overly salty—a common mistake if table salt was used instead due to its finer granules which could lead us astray!
- 2 teaspoons finely chopped rosemary (plus extra for topping): Fresh rosemary truly shines here—its aromatic quality pairs wonderfully with roasted garlic! When chopping herbs like rosemary finely releases their essential oils effectively maximizing their fragrance throughout baking—trust me on this one!
Equipment You’ll Need:
Having the right tools at your disposal makes any cooking experience smoother—and let me tell you; baking artisan bread is no exception! While these tools may not be ingredients per se, they are essential partners in creating something wonderful.
- Mixing bowls – A couple of sturdy mixing bowls are essential here; they allow us space to combine our wet and dry ingredients comfortably while giving room enough for rising dough too!
- Dutch oven – This magical pot retains heat exceptionally well which mimics professional steam ovens found in bakeries when covered during baking time; this creates an incredibly crusty exterior while keeping moisture inside!
- Parchment paper – Using parchment paper simplifies transferring dough into your hot Dutch oven while preventing sticking issues—it’s definitely worth having on hand here!
Preparing the Rosemary & Roasted Garlic Artisan Bread
Step 1: Roast Your Garlic
First things first—we’re going to unlock all those marvelous flavors hidden within our head of garlic! Preheat your oven to 400°F (204°C) as you slice off just enough from the top of the bulb so individual cloves are exposed but still intact within their skins—you want them snug like friends at a cozy gathering! Drizzle generously with extra virgin olive oil ensuring every exposed clove gets coated evenly before sprinkling coarse sea salt overtop along with freshly cracked black pepper—to taste—and wrapping them snugly in foil like little gifts destined for greatness! Pop them into your preheated oven where they’ll bask patiently for about 40 minutes until soft and golden brown; resist any temptation to rush this step—it’s crucial because roasting deepens sweetness transforming sharpness into heavenly softness—think caramelized goodness as opposed simply raw pungent bites!
Step 2: Activate Your Yeast
While waiting on those wonderful cloves’ transformation take some time tending towards your yeast mixture which brings life into our dough! In one bowl combine 1½ cups room temperature water alongside 1 teaspoon active dry yeast giving them gentle stir before setting aside where they can mingle together peacefully until frothy—about 10–15 minutes should suffice here! Watching those bubbles form is akin watching magic unfold—it signals readiness indicating fermentation has begun successively filling us all anticipation toward future loaves ahead!
Step 3: Combine Dry Ingredients
Now let’s shift focus back towards creating structure via gluten formation within our dough by combining three cups flour (bread or all-purpose) along with half teaspoon dried oregano plus one teaspoon kosher salt inside another mixing bowl—give everything good whisk so they can harmoniously blend together ensuring even distribution prior inviting wet elements along next stage soon thereafter!
Step 4: Mix It All Together
Once yeasty mixture appears frothy combine smashed roasted garlic (you’ll want them soft enough they easily yield under pressure), remaining olive oil alongside prepared flour mix using spatula until just incorporated—don’t overdo it here as blending excessively could lead tough results later down line—we prefer airy lightness instead don’t we? Cover bowl afterward allowing dough rise undisturbed somewhere warm until doubled size roughly eight-to-ten hours later—that waiting period builds depth flavors too immensely rewarding trust me here patience remains virtue amidst baking adventures ahead awaiting us soon enough…
The Art of Waiting: Allowing Dough to Rise
Step 5: The Transformative Rise
Ah, the magic of fermentation! This step is where the dough begins its enchanting transformation, and I can assure you, it’s a critical part of creating that airy, open crumb texture we all crave in artisan bread. After you’ve combined your ingredients into a shaggy mass, it’s time to let it rise. Find a cozy nook in your kitchen—perhaps near a window where the sun’s warmth can gently embrace your dough. Cover the bowl with a damp cloth or plastic wrap; this helps retain moisture while allowing the dough to breathe. Now, patience is key here; you’ll want to leave it undisturbed for about 8 to 10 hours. You may wonder why such an extended period is necessary. Well, during this time, the yeast will work its magic, consuming sugars and producing carbon dioxide—this is what gives your bread that delightful lift! When you return, you’ll notice that the dough has doubled in size and is bubbly on the surface—a sure sign that all is going well. If it seems a bit shy and hasn’t risen much, don’t fret; just give it some extra time. Remember, every kitchen has its unique climate!
Shaping Your Masterpiece
Step 6: Molding the Dough
Once your dough has risen beautifully, it’s time for one of my favorite parts—shaping! Dust your countertop lightly with flour to prevent any sticking. Gently turn out your dough onto the floured surface; you want to treat it kindly at this stage—it’s delicate yet full of promise! Lightly flour your hands and begin to fold the edges toward the center to form a rough ball shape. This technique is called pre-shaping, and it’s crucial because it helps create tension on the surface of the dough, which in turn leads to a gorgeous crust when baked. Don’t rush this step; take your time to ensure each fold is intentional and gentle.
Once you’ve shaped it into a ball, flip it seam-side down and cover it with a kitchen towel while you prepare for its next resting phase. This brief rest (about 15-20 minutes) allows the gluten strands to relax after their workout during rising. You’ll notice how pliable and easy-to-handle the dough becomes after this short break—trust me; it’s like giving it a mini spa day!
Chilling for Flavor
Step 7: The Overnight Chill
Now comes a step that many might overlook but trust me—it’s absolutely paramount! After shaping your dough into its final form, place it seam-side up in a floured bowl or proofing basket for its overnight chill in the refrigerator. Yes, you heard me right! While some might be eager to throw their bread into the oven right away, allowing it to chill for at least overnight (or up to 48 hours) enriches the flavor significantly through slow fermentation. During this time in cold storage, enzymes continue breaking down starches into simpler sugars—this means more flavor complexity when you finally bake!
When you’re ready for baking day, take note of how wonderfully puffed up your dough looks after chilling—it may even expand further as it warms up at room temperature before baking. Just remember not to rush this step; good things come to those who wait!
Prepping for Baking Glory
Step 8: Ready Your Oven & Shape
Before diving into baking mode, preheat your oven to 450°F (232°C) while simultaneously placing your Dutch oven inside—a hot vessel means perfectly crisp crusts! As you wait for that soothing warmth enveloping your kitchen (and believe me, you’ll love that aroma), carefully remove your chilled dough from refrigeration. Dust your parchment paper generously with flour so that transferring will be seamless.
Now comes another shaping moment—gently flip your dough onto that prepared parchment paper seam-side down and coax it into a nice round shape without deflating too much air from within. Next comes scoring—the art of cutting slashes across the top of your loaf before baking. Not only does this create visual appeal, but it also allows steam to escape during baking which results in an even rise and beautiful crust formation.
As you’re scoring with a sharp knife or blade (a baker’s lame works beautifully if you have one!), think about how these cuts will define how beautifully rustic and artisan-like your bread will look once baked—that’s something worth celebrating!
Baking Your Perfect Rosemary & Roasted Garlic Artisan Bread
Step 9: Unleashing Flavor
It’s finally time for what I like to call “the grand unveiling!” Carefully transfer your scored loaf along with the parchment paper into your preheated Dutch oven—you’ll hear a satisfying sizzle as soon as it touches that hot surface! Quickly cover with the lid and allow it to bake undisturbed for about 30 minutes; this covered environment traps steam which is crucial for developing that lovely crust while keeping moisture locked inside.
After half an hour has passed (it feels like an eternity when you’re impatiently waiting), remove the lid and behold! Your loaf should have risen impressively during this time—now let’s finish off that golden crust by baking uncovered for another 15-20 minutes until it’s irresistibly deep golden brown on top. The aroma wafting through your kitchen will be utterly intoxicating—I promise you’ll feel like you’ve entered an artisanal bakery!
When done right—the crust should be crisp yet crackling under pressure when tapped gently on its bottom—the sound resonates with satisfaction! Once baked, let your masterpiece cool on a wire rack before slicing into it; this waiting period allows steam inside to settle down so you can enjoy perfectly sliced pieces without any gooey mess.
Enjoy Your Creation!
And there you have it—your very own Rosemary & Roasted Garlic Artisan Bread! Each bite reveals layers of flavor from fragrant rosemary paired with sweet roasted garlic melded together within soft chewy crumbs surrounded by that coveted crusty exterior. Serve slices warm with good quality olive oil or use them as vehicles for soups or hearty salads—the possibilities are endless!
This recipe embodies not just cooking but also love shared among family and friends around tables filled with joy and laughter. So next time someone asks where you got such delicious bread from—smile knowingly because now you can say it’s made by you! Happy baking!
Storage and Enjoyment Tips for Your Rosemary & Roasted Garlic Artisan Bread
Now that you’ve whipped up a delightful loaf of Rosemary & Roasted Garlic Artisan Bread, let’s talk about how to savor every last crumb of your creation! The journey of baking this bread is just the beginning; the real joy comes in the moments you share it with family and friends. Whether you’re enjoying it fresh out of the oven or a couple of days later, this bread will continue to bring warmth and flavor to your table. But before we dig into how to store it, let me assure you: this bread is best enjoyed while still warm, slathered with a bit of olive oil or perhaps a luscious spread. Let’s explore how we can keep that taste alive!
Storing Leftover Rosemary & Roasted Garlic Artisan Bread
To ensure your Rosemary & Roasted Garlic Artisan Bread remains as delicious as the day it was baked, proper storage is key! I recommend placing your leftover bread in a paper bag or wrapping it in a clean kitchen towel. This allows the bread to breathe while preventing it from drying out too quickly—a crucial balance that retains its soft interior yet maintains that delightful crust. If stored correctly at room temperature, your artisan loaf should stay fresh for about 3 to 4 days. However, if you happen to have some left after that (which I doubt!), you might notice that it starts to lose its charm. A little pro tip? For those who love convenience: slicing your bread before storing allows you to take out only what you need without compromising the entire loaf’s texture. When you’re ready to indulge again, simply pop those slices in the toaster or warm them up in the oven for a few minutes—trust me when I say nothing compares to that aromatic revival!
Freezing Rosemary & Roasted Garlic Artisan Bread for Later
If you find yourself with more bread than you can consume within a few days—or if you want to prepare ahead for those busy weeknights—freezing is an excellent option! To freeze your artisan bread properly, wrap it tightly in plastic wrap or aluminum foil; then place it inside a resealable freezer bag. This method prevents freezer burn and keeps those enticing flavors intact. Your bread will remain deliciously preserved for up to 3 months in the freezer. When you’re ready to enjoy it again, simply remove the desired amount from the freezer and allow it to thaw at room temperature for a couple of hours. For an even quicker option, slice before freezing and toast straight from frozen! The convenience of having homemade artisan bread on hand is truly extraordinary—it means warm, fragrant loaves are always just a moment away.
With these storage tips under your belt, you’ll be able to relish every bite of your Rosemary & Roasted Garlic Artisan Bread long after baking day!
Rosemary & Roasted Garlic Artisan Bread
Indulge in the delightful warmth of Rosemary & Roasted Garlic Artisan Bread, a no-knead recipe that transforms simple ingredients into an extraordinary culinary experience. The fragrant pairing of fresh rosemary and sweet roasted garlic fills your kitchen with comforting aromas, enticing family and friends to gather around the table. With minimal effort, this crusty yet chewy loaf becomes a versatile accompaniment to cozy dinners or festive gatherings. Whether you serve it warm with olive oil, pair it with hearty soups, or enjoy it as a simple snack, this bread will surely impress even the most discerning palates.
- Prep Time: 20 minutes
- Cook Time: 60 minutes
- Total Time: 1 hour 20 minutes
- Yield: Approximately 12 servings 1x
- Category: Bread
- Method: Baking
- Cuisine: American
Ingredients
- 1 head garlic
- Extra-virgin olive oil
- Coarse sea salt
- Freshly ground black pepper
- 1½ cups water (room temperature)
- 1 teaspoon active dry yeast
- 3 cups bread or all-purpose flour
- ½ teaspoon dried oregano
- 2 teaspoons finely chopped rosemary (plus extra for topping)
Instructions
- Roast the garlic at 400°F (204°C) by slicing the top off the bulb, drizzling with olive oil, sprinkling with salt and pepper, and wrapping in foil. Bake for about 40 minutes until soft.
- In a bowl, combine room temperature water and yeast; let sit until frothy (about 10–15 minutes).
- In another bowl, whisk together flour, oregano, and salt.
- Mix the frothy yeast mixture, smashed roasted garlic, and remaining olive oil into the flour mixture until just combined. Cover and let rise for 8–10 hours.
- Shape the dough gently into a ball and rest for another 15–20 minutes.
- Chill shaped dough overnight in the refrigerator.
- Preheat oven to 450°F (232°C) with a Dutch oven inside. Score the dough on parchment paper and transfer it to the hot pot.
- Bake covered for 30 minutes, then uncover and bake for an additional 15–20 minutes until golden brown.
Nutrition
- Serving Size: 1 serving
- Calories: 150
- Sugar: 0g
- Sodium: 200mg
- Fat: 4g
- Saturated Fat: 0.5g
- Unsaturated Fat: 3g
- Trans Fat: 0g
- Carbohydrates: 28g
- Fiber: 1g
- Protein: 4g
- Cholesterol: 0mg