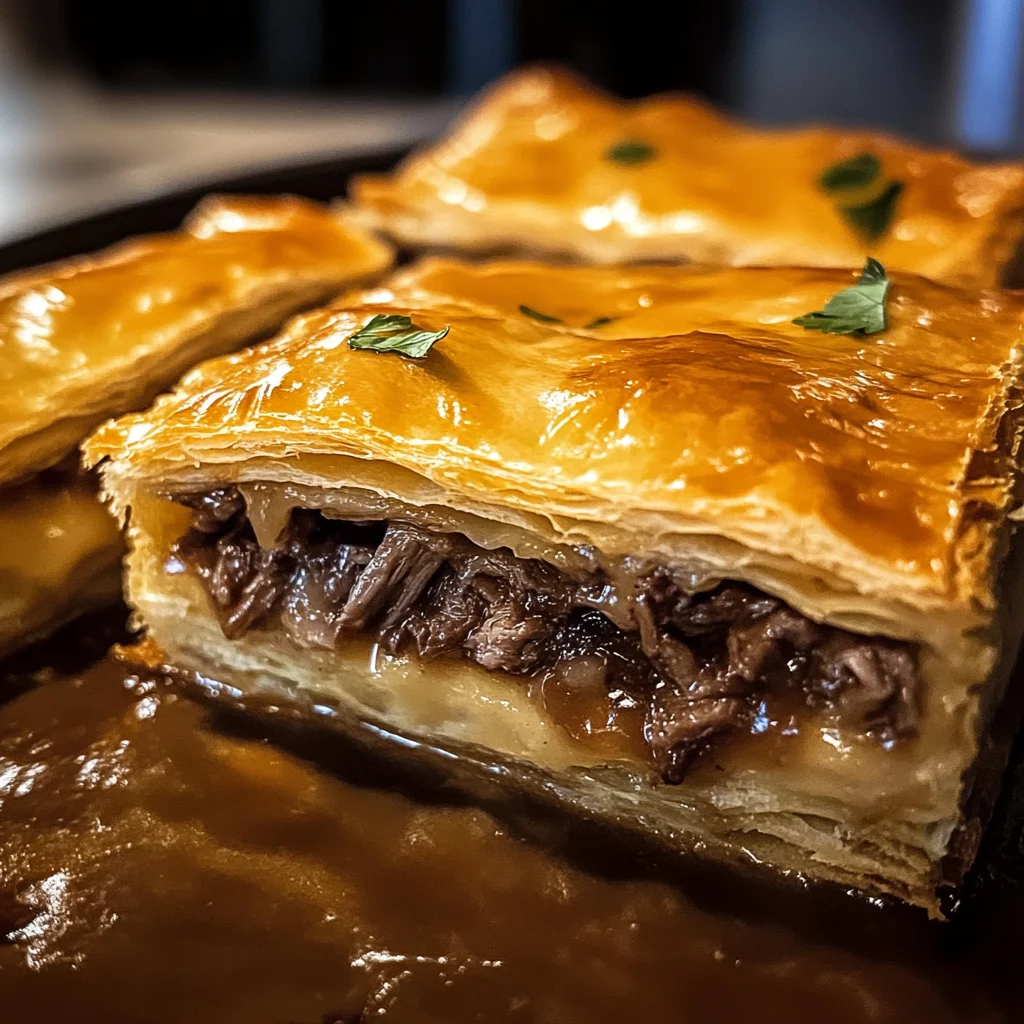
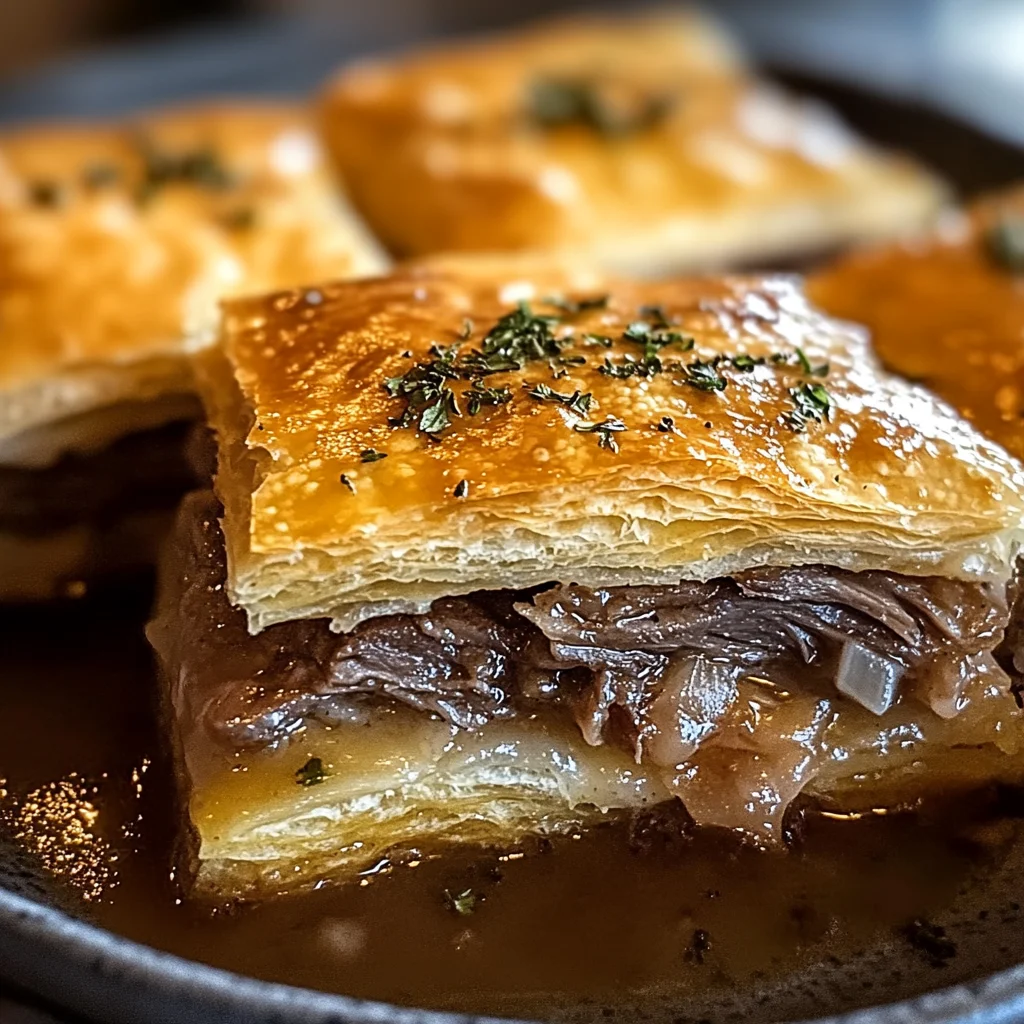
French Dip Squares
There’s something undeniably magical about a recipe that brings warmth and joy to the table, and these French Dip Squares do just that. When I think of gatherings with family and friends, I envision laughter echoing through the kitchen, savory aromas dancing in the air, and everyone gathered around to savor each mouthful of deliciousness. These squares are more than just food; they’re an experience that creates lasting memories. Imagine buttery crescent roll dough enveloping tender layers of roast beef and gooey Swiss cheese, all drenched in a rich dipping broth that warms your soul. Each bite is a delightful harmony of flavors that feel like a warm hug on a chilly evening. Trust me when I say, these French Dip Squares are destined to become your new favorite dish!
What makes this recipe even more special is its easy-going nature—perfect for any occasion! Whether you’re hosting a casual get-together or enjoying a cozy family dinner, these squares will steal the show. They’re an innovative twist on the classic French Dip sandwich, transforming it into shareable bites that invite everyone to dive in. And let’s be honest—who doesn’t love food you can eat with your hands while chatting with loved ones? This dish is not just about satisfying hunger; it’s about connection, laughter, and creating moments that linger long after the last square has been devoured.
Ingredients:
Embarking on this culinary journey is a breeze thanks to the simplicity of the ingredients. Each component plays a vital role in crafting these unforgettable French Dip Squares that will have everyone coming back for seconds!
- 2 cans of refrigerated crescent rolls. These delightful rolls serve as the perfect base for our squares, providing that buttery, flaky texture we all adore. When selecting your crescent rolls, aim for those made with high-quality ingredients—this ensures a rich flavor and tender crumb. The beauty of using refrigerated dough is not only its convenience but also how it puffs and browns beautifully in the oven, forming a golden crust that’s simply irresistible.
- 1/2 pound deli-sliced roast beef. The star of our filling! I always opt for high-quality deli meats because they bring depth and flavor to our dish. The thinly sliced roast beef melts in your mouth and pairs perfectly with the gooey Swiss cheese nestled beside it. If you’re feeling adventurous, consider exploring other roast meats or even marinated grilled chicken as alternatives! Each option brings its own unique flavor profile to this comforting classic.
- 1 cup grated Swiss cheese. This cheese adds a creamy richness that perfectly complements the savory notes of the beef. Its mellow flavor balances out the dish wonderfully while also creating that delightful stretchiness we crave when biting into cheesy goodness! Grating your own cheese rather than using pre-packaged options can elevate this dish even further; freshly grated cheese melts beautifully and enhances every bite.
- 1 packet dry onion soup mix. This ingredient is like liquid gold for flavor! It infuses our squares with an incredible umami punch that’s both savory and aromatic. The blend of onions, garlic, and spices creates depth without requiring hours of prep work—what’s not to love? Feel free to experiment here; you could create your own seasoning mix if you’re feeling inspired!
- 1/4 cup melted butter. Ahh, butter—the ultimate enhancer in almost every recipe! In this case, melted butter helps bind our onion soup mix together while also brushing over our top layer of dough before baking for that coveted golden finish. Quality matters here too; choose unsalted butter to allow you full control over seasoning.
- 1 teaspoon Worcestershire sauce. This tangy sauce adds complexity to our filling mixture by bringing together sweet and savory flavors beautifully! It’s essential for elevating our squares from good to extraordinary; just a dash works wonders! If you want a vegetarian-friendly option, there are plant-based Worcestershire sauces available at most grocery stores.
- 1/2 teaspoon garlic powder. Garlic powder provides an aromatic warmth without being overpowering—it blends seamlessly into our filling mixture while enhancing all the other flavors at play here. If you prefer fresh garlic instead, feel free to substitute one clove minced into the mixture!
- 1 cup beef broth (for dipping). A warm bowl of savory broth is non-negotiable when serving French Dip Squares! It’s what transforms each square into a luxurious bite as you dip them in before savoring every morsel. Choose low-sodium broth for better control over saltiness or make your own homemade broth if time permits—this simple addition lifts everything off the plate and creates true comfort food.
Equipment You’ll Need:
Cooking becomes so much more enjoyable when you have the right tools at your fingertips! While they may not be ingredients themselves, each piece of equipment acts as an essential partner in bringing these French Dip Squares to life effortlessly.
- 9×13 inch baking dish – This size is ideal for allowing ample space for your French Dip Squares to bake evenly while giving them room to puff up nicely during cooking! A glass or ceramic dish works beautifully here since they distribute heat evenly.
- Rolling pin – A trusty rolling pin will help flatten out those crescent rolls effortlessly so they meld together perfectly without any gaps or seams—a crucial step for achieving that flaky texture we all adore!
- Mixing bowls – You’ll want different sizes on hand: one large bowl for mixing up our filling components comfortably and another smaller bowl for mixing together those savory seasonings before drizzling over our masterpiece.
- Sharp knife or pizza cutter – To slice through those golden squares post-baking smoothly without squishing them down—nobody wants mushy bites when serving guests! A sharp knife makes clean cuts while maintaining shape; alternatively, use a pizza cutter if you prefer swift slicing motions!
Now that we’ve got all our ingredients lined up like eager guests ready to join us at dinner time let’s dive into preparing these scrumptious French Dip Squares together!
Step 1: Preheat Your Oven & Prepare Your Baking Dish
The first step might seem straightforward but it’s absolutely paramount—preheating your oven ensures even cooking from start to finish! Set it at 375°F (190°C) so by the time we’re ready with everything else, it’ll be hot enough to create magic inside our baking dish! Lightly spray your 9×13 inch baking dish with non-stick cooking spray—a small but significant detail that prevents sticking later on when we’re ready to serve these flavorful squares hot from the oven.
Step 2: Layer That Base!
Now comes one of my favorite parts: rolling out one can of crescent rolls directly into our prepared baking dish! Take your time here—press any seams together gently until you’ve formed an even layer across the bottom; this creates an inviting canvas for all those scrumptious fillings ahead! Don’t rush this step; having a solid base sets us up perfectly for success later on when layering flavors come into play!
Step 3: Add Your Filling
Once you’ve established that beautiful foundation with crescent roll dough, it’s time to introduce our main event—the roast beef! Spread those deli-sliced pieces evenly across the dough; every bite deserves its fair share of tender goodness after all! Next up comes sprinkling shredded Swiss cheese generously overtop—it’ll melt down delectably during baking time while adding creaminess throughout each square as they bake away into beautiful golden perfection!
Step 4: Create Flavor Magic
In a small bowl now comes my secret weapon—the dry onion soup mix combined with melted butter along with Worcestershire sauce & garlic powder lovingly whisked together until smooth forms an intoxicating glaze awaiting drizzling upon our lovely layers below! This process known as “infusing” allows flavors from all ingredients meld harmoniously as they meld during baking too! Drizzle generously over everything ensuring maximum coverage because trust me—you won’t want any dry bites here whatsoever!
I hope you’re as excited as I am about diving deeper into making these delightful French Dip Squares come alive in your kitchen—stay tuned because there’s plenty more deliciousness ahead!
Step 5: Crafting the Perfect Top Layer
Now it’s time to create the crowning glory of these French Dip Squares. Roll out the second can of crescent rolls — this is where you’ll build that beautiful, flaky topping that encases all those savory fillings. As you unroll the dough, take a moment to appreciate its buttery aroma; it’s a promise of comfort and warmth. You want to gently peel off the dough, being careful not to tear it apart. It’s crucial to maintain its integrity because this layer serves as a protective shield for the delicious roast beef and Swiss cheese beneath. Once it’s unrolled, carefully place it over the beef and cheese layer.
Use your fingers to pinch together any seams or gaps between the dough sheets. This step is absolutely paramount because it ensures that none of that mouthwatering filling escapes during baking! If you leave openings, those precious juices will ooze out instead of creating a gooey, cohesive square you can revel in later. Take a moment here—breathe in that delightful scent—and remember that patience pays off in cooking. A smooth top layer not only looks better but also helps retain moisture, giving you soft, tender bites later on.
Step 6: Baking Your Perfect French Dip Squares
With everything beautifully layered and sealed, it’s time to send your creation into the oven for some transformative magic. Preheat your oven to 375°F (190°C), ensuring it’s nice and hot before you bake; this initial blast of heat will help create a lovely golden crust on top while keeping the insides wonderfully soft. Place your baking dish in the center of the oven – this allows for even heat distribution which is crucial for uniform cooking.
You’ll want to keep an eye on them as they bake for about 15-20 minutes; look for that gorgeous golden brown color which indicates they’re done. The crescent rolls should puff up beautifully, forming that inviting flaky texture we all adore. You can actually smell when they’re ready—there’s an intoxicating aroma wafting through your kitchen that signals blissful bites ahead! Trust me, you don’t want to rush this step; allowing them to bake until perfectly golden ensures a delightful crunch on the outside while keeping everything inside warm and melty.
Step 7: Preparing the Dipping Sauce
While your French Dip Squares are basking in their oven spa treatment, let’s turn our attention to one of the most essential components: the dipping sauce! In a small pot over medium heat, pour in one cup of beef broth—a simple yet profoundly satisfying addition that elevates each bite from ordinary to extraordinary. This beef broth isn’t just a condiment; it’s like liquid gold that brings all flavors together harmoniously when you dip into it.
As you warm up the broth, take a moment to stir gently and let it come just to a simmer—not boiling! You want those flavors to meld together without losing any richness or depth. This gentle heating helps activate all those savory notes while ensuring your broth is at an ideal temperature for dipping once your squares are ready. I promise you; having warm broth waiting will enhance every morsel when you’re ready to indulge!
Step 8: Cooling & Cutting with Care
After approximately 20 minutes in the oven, pull out your golden-brown masterpiece and allow it to cool slightly—this part is so important! While I know how tempting it can be to dive right in (because trust me, I’ve been there!), letting them rest for about five minutes will make cutting so much easier and cleaner. This cooling time allows the layers within your French Dip Squares to settle just enough so they don’t spill everywhere when you slice into them.
To cut them properly, use a sharp knife or pizza cutter and make deliberate cuts into squares—aiming for four rows down and four across gives you perfectly portioned bites ready for dipping! Watch for that melty cheese stretching out as you cut; it’s such a heartwarming sight! This visual cue means everything has cooked through nicely while maintaining its gooey essence inside. Don’t worry if they aren’t perfect squares at first—it’s about enjoying what you’ve created more than anything else.
Final Touches: Serving Up Your Culinary Triumph
Now comes perhaps my favorite part—serving these delectable French Dip Squares! Arrange them beautifully on a platter alongside your warmed broth for dipping; presentation matters because we eat with our eyes first! As you invite everyone over to dig in, notice how they gather around instinctively—the aroma alone draws people in like moths to a flame.
When you’re ready to savor these delightful bites, encourage everyone to dunk generously into that rich beef broth before taking their first bite—this act transforms each square from good to utterly intoxicating! The combination of buttery pastry with tender roast beef and melted Swiss cheese complemented by that savory dip creates an explosion of flavor that is truly extraordinary.
So gather around with friends or family, share stories, laughter, and enjoy every last morsel together—you’ve crafted something special here—a dish that’s not just food but an experience filled with warmth and connection. Bon appétit!
Storage and Enjoyment Tips for Your French Dip Squares
Congratulations on creating your very own batch of French Dip Squares! I can almost hear the laughter and chatter around your table as you serve these delightful bites, which are sure to be a hit among family and friends. But what happens if you have leftovers? Fear not! There’s plenty of joy to be had even after the last square is devoured.
Storing Leftover French Dip Squares
To keep those glorious French Dip Squares fresh, I recommend transferring any leftovers to an airtight container. This will help seal in the flavors and maintain that delectable texture that makes these squares so irresistible. When stored correctly in the refrigerator, your leftovers can last up to three days—just long enough to enjoy them again without feeling like you’re having the same meal twice in a row! If you’re really keen on preserving their goodness, try placing a piece of bread in the container with them; this little trick helps absorb excess moisture, keeping the dough from becoming soggy. When you’re ready to indulge again, simply pop them in the oven at 350°F (175°C) for about 10-15 minutes until they’re warmed through and that melty Swiss cheese is gooey once more. Trust me, every bite will taste like it just came out of the oven!
Freezing French Dip Squares for Later
If you want to enjoy these tasty squares even further down the line, freezing them is an excellent option! To freeze your French Dip Squares, allow them to cool completely before wrapping each square tightly in plastic wrap or aluminum foil—this prevents freezer burn and keeps their flavors intact. Place your wrapped squares in a freezer-safe bag or container, and they’ll be good for up to three months. When you’re ready to enjoy them again, there’s no need to thaw; just bake them straight from the freezer at 375°F (190°C) for about 20-25 minutes until heated through and crispy on top. The convenience of having a delicious meal ready at a moment’s notice makes this method a winner in my book!
French Dip Squares
Indulge in the delightful experience of French Dip Squares, a savory twist on the classic French Dip sandwich. These shareable bites combine buttery crescent roll dough with tender layers of roast beef and cheesy Swiss goodness. Paired with a warm dipping broth, each square transforms into a comforting morsel that invites laughter and connection at any gathering. Whether it’s game night or a cozy family dinner, these French Dip Squares are destined to become a staple in your repertoire. Easy to prepare and full of flavor, they’re perfect for bringing people together for memorable moments.
- Prep Time: 15 minutes
- Cook Time: 20 minutes
- Total Time: 35 minutes
- Yield: Approximately 12 servings 1x
- Category: Appetizer
- Method: Baking
- Cuisine: American
Ingredients
- 2 cans refrigerated crescent rolls
- 1/2 pound deli-sliced roast beef
- 1 cup grated Swiss cheese
- 1 packet dry onion soup mix
- 1/4 cup melted butter
- 1 teaspoon Worcestershire sauce
- 1/2 teaspoon garlic powder
- 1 cup beef broth (for dipping)
Instructions
- Preheat your oven to 375°F (190°C) and lightly spray a 9×13 inch baking dish with non-stick cooking spray.
- Roll out one can of crescent rolls into the prepared dish, pressing seams together to form an even layer.
- Layer the deli-sliced roast beef evenly over the dough, followed by the grated Swiss cheese.
- In a small bowl, mix melted butter, onion soup mix, Worcestershire sauce, and garlic powder; drizzle this mixture over the layers.
- Roll out the second can of crescent rolls and place it on top, sealing seams to prevent filling from escaping.
- Bake for 15-20 minutes or until golden brown. Meanwhile, warm the beef broth in a small pot for dipping.
- Allow to cool slightly before cutting into squares and serving with warm broth.
Nutrition
- Serving Size: 1 square (100g)
- Calories: 280
- Sugar: 2g
- Sodium: 740mg
- Fat: 18g
- Saturated Fat: 8g
- Unsaturated Fat: 8g
- Trans Fat: 0g
- Carbohydrates: 24g
- Fiber: 1g
- Protein: 10g
- Cholesterol: 35mg