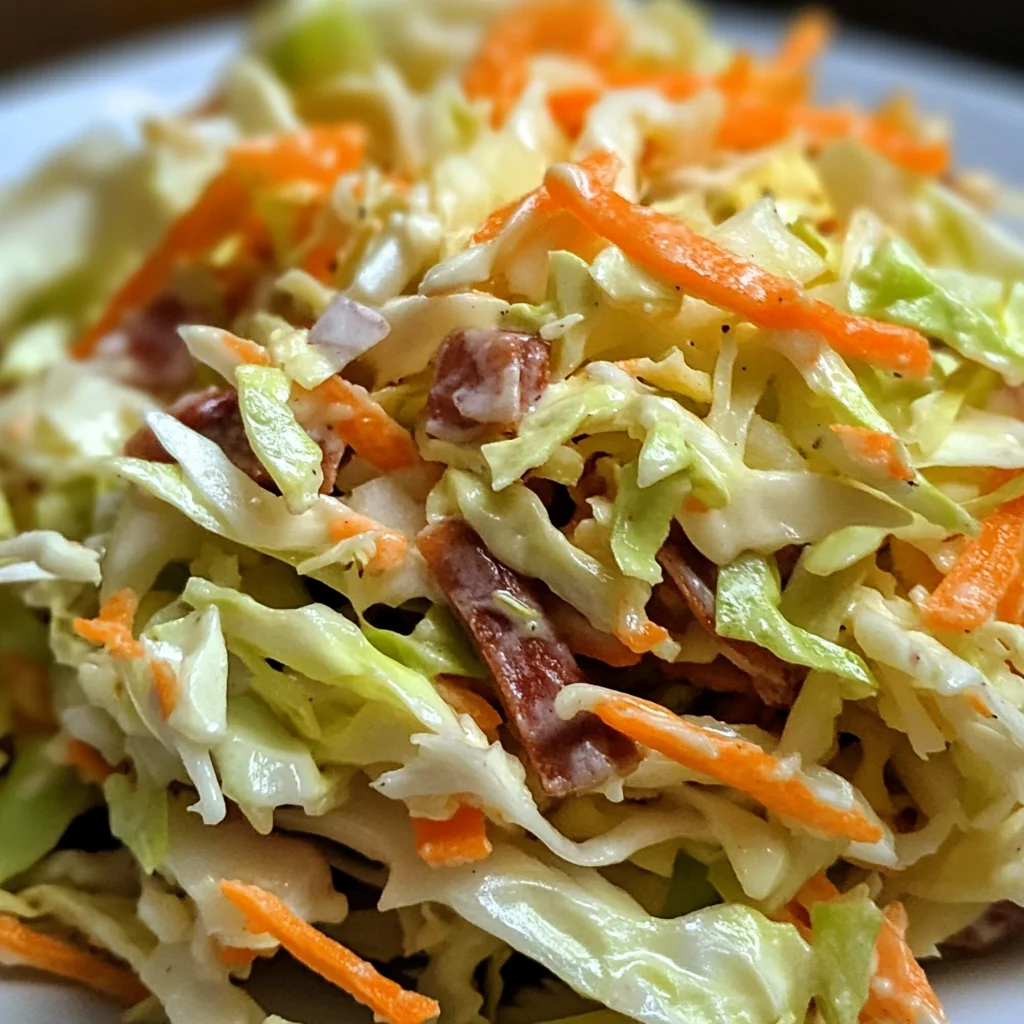
The Best Vinegar Based Coleslaw
There’s something profoundly satisfying about a simple bowl of coleslaw, isn’t there? It’s more than just a side dish—it’s an experience that brings together the crunch of fresh vegetables, the zing of vinegar, and just the right balance of sweetness. My heart swells every time I think about The Best Vinegar Based Coleslaw because it embodies everything I love about food: the way it can transport us back to summer barbecues on sunlit afternoons, or those cozy family dinners where laughter and stories flow as freely as the food. This is not just any coleslaw; it’s a glorious celebration of flavors that elevates any meal, especially when paired with smoky grilled meats or piled high on a sandwich.
The beauty of this recipe lies in its simplicity, yet its flavors are absolutely extraordinary. Each bite resonates with a symphony of tanginess thanks to the cider vinegar and a hint of sweetness from sugar that dances across your palate. Trust me when I say, this mayo-free dressing is a revelation! It’s light and refreshing, which makes it perfect for those hot days when you crave something crisp to accompany your favorite dishes. Whether you’re serving it alongside barbecued chicken or heaping it onto pulled beef sandwiches, this The Best Vinegar Based Coleslaw will undeniably steal the show.
The Best Vinegar Based Coleslaw: A Refreshing Twist on a Classic
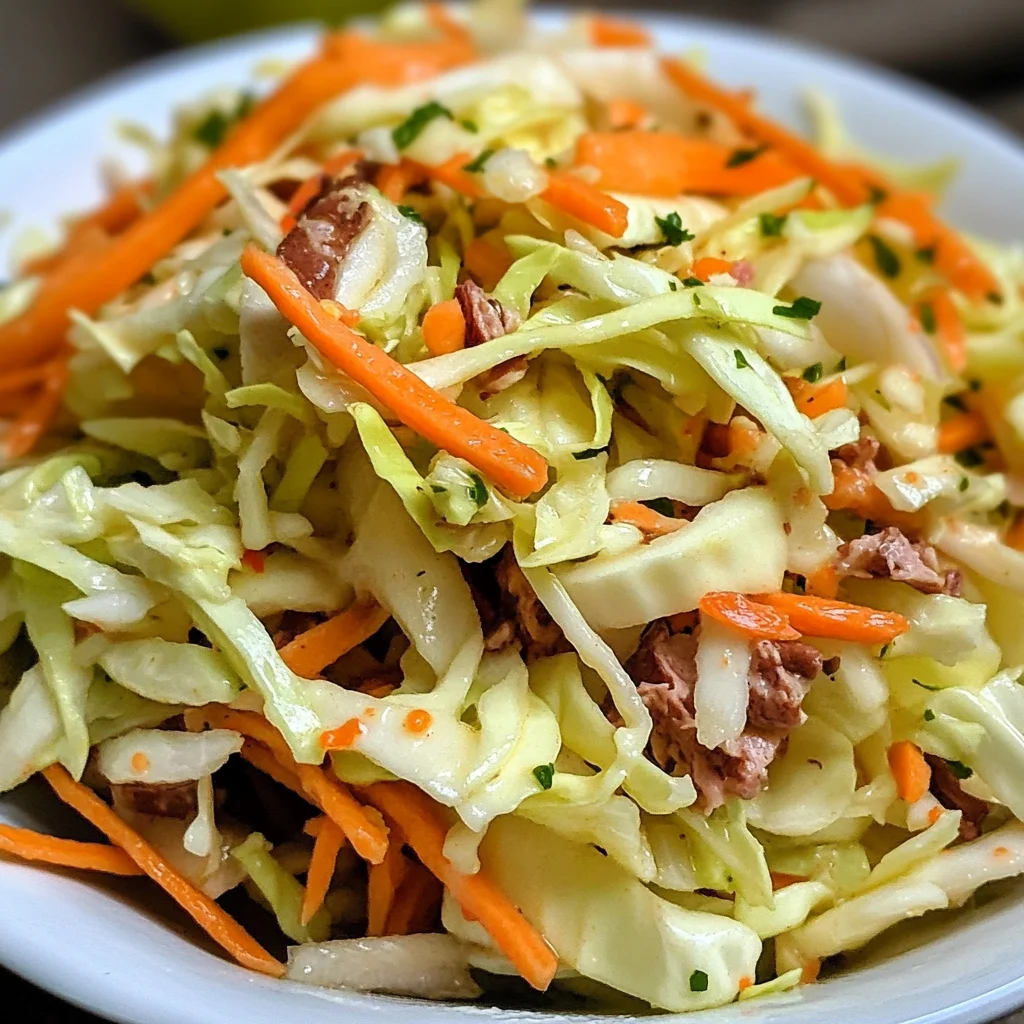
Let’s embark on this delightful culinary journey together! This coleslaw is not just another salad; it’s an invitation to savor each ingredient and relish in the magic of combining them into something truly special. With vibrant hues from fresh cabbage and carrots, it’s as pleasing to the eyes as it is to the tastebuds. So grab your cutting board and let’s create something unforgettable!
Ingredients:
As we gather our ingredients for The Best Vinegar Based Coleslaw, keep in mind that each component plays an essential role in crafting this delicious dish. From the crunch of fresh vegetables to the tangy dressing that ties everything together, every detail matters.
- 1/2 cup cider vinegar: This ingredient is vital for creating that signature tangy flavor that makes vinegar-based coleslaws so refreshing. Cider vinegar has a gentle fruitiness that works wonders in balancing out sweetness from sugar while enhancing the crunch of cabbage and carrots. When selecting cider vinegar, aim for organic or raw varieties if possible; they tend to retain more nutrients and offer a deeper flavor profile. If you’re in a pinch, white wine vinegar can be substituted, but trust me—cider vinegar is non-negotiable for achieving that authentic taste.
- 1/2 cup sugar: Ahh, sugar—the magical ingredient that balances acidity beautifully! In this recipe, sugar provides just the right amount of sweetness to complement the sharpness of the cider vinegar. It dissolves seamlessly into our dressing during cooking and enhances all other flavors without being overpowering. If you’re looking for alternatives due to dietary preferences, feel free to experiment with agave syrup or honey (if you’re not strictly vegan) as these will lend their own unique flavors while keeping things sweet.
- 1 teaspoon celery seed: A small but mighty player in our coleslaw! Celery seeds impart an earthy depth that rounds out the overall flavor profile beautifully. Their slightly nutty aroma adds complexity and pairs perfectly with both cabbage and carrots. When choosing celery seed, look for whole seeds rather than ground ones; they’ll deliver better texture and flavor impact when incorporated into our vinaigrette.
- 1 teaspoon salt: Salt is often referred to as a flavor enhancer—and rightly so! In this recipe, salt does more than simply season; it draws out moisture from vegetables while amplifying their natural flavors. A good quality sea salt or kosher salt works wonders here; avoid table salt if possible since it can sometimes contain anti-caking agents that alter taste.
- 1/2 teaspoon black pepper: Just a pinch of freshly cracked black pepper adds warmth without overwhelming our zesty dressing. The slight heat from black pepper contrasts beautifully with sweetness and acidity while providing an aromatic kick that brightens every bite. If you want to spice things up even further, feel free to play around with different pepper varieties—like white pepper for more subtlety or even chili flakes for some heat!
- 1/4 cup olive oil: Think of olive oil as the silky embrace tying all ingredients together in harmony. Not only does it add richness and body to our vinaigrette; it also enhances mouthfeel while softening sharp flavors from vinegar and pepper—creating an utterly intoxicating dressing! Choose extra virgin olive oil for its robust flavor—it’ll make all the difference in elevating your coleslaw’s overall profile.
- 1 small head of green cabbage (about 2 pounds), shredded: Cabbage is undoubtedly the star here! Its crisp leaves offer both texture and structure while soaking up all those flavorful dressing components. When selecting cabbage at your local market or grocery store, look for heads that feel heavy for their size with tightly packed leaves—this ensures freshness! You can also opt for red cabbage if you prefer a splash of color in your dish—just remember it’ll alter both appearance and taste slightly.
- 2 medium carrots (peeled and shredded): Carrots add not only vibrant color but also natural sweetness—a perfect counterpart to tangy elements within our coleslaw! Shredding them finely allows their sweetness to meld effortlessly into each bite while providing delightful crunch alongside cabbage. Choose firm carrots with rich orange color; they should feel heavy in hand—avoid any limp or shriveled ones!
Equipment You’ll Need:
Before diving into making The Best Vinegar Based Coleslaw, let’s talk about our essential kitchen companions—the equipment! Having these tools on hand ensures your culinary experience remains smooth sailing from start to finish.
- Small saucepan: This trusty vessel will be used for heating up our dressing ingredients until they mingle together perfectly! A non-stick saucepan works well here since we want everything to dissolve smoothly without sticking—plus cleanup will be easier afterward!
- Whisk: An absolute must-have tool here! A whisk helps combine all liquids into one cohesive dressing by aerating them as you mix—ensuring no lumps remain while encouraging even distribution throughout your coleslaw once added.
- Large mixing bowl: Opting for a spacious bowl allows ample room when tossing cabbage, carrots, and dressing together without spilling over edges! Look for one made from glass or stainless steel—both materials are durable enough against vigorous mixing.
- Sharp knife & cutting board: These fundamental tools aren’t just vital—they’re non-negotiable when prepping fresh produce! A sharp knife makes quick work slicing through firm veggies like cabbage while ensuring precision cuts during shredding processes—safety first!
Now that we have everything ready let’s move forward into preparing this delightful The Best Vinegar Based Coleslaw!
Step 1: Crafting Your Divine Dressing
Begin by placing your small saucepan over medium heat—a gentle touch is key here as we want delicate warming rather than boiling fury! Pour in your measured cider vinegar along with sugar followed by celery seed before adding salt and freshly cracked black pepper too—all these elements create layers upon layers of flavor goodness waiting within our vinaigrette! Use your whisk generously at this stage; stirring continuously ensures equal distribution while helping sugar dissolve completely—trust me when I say watching those granules vanish feels like magic unfolding right before your eyes!
Once dissolved fully (you’ll notice no gritty residue remains), allow mixture gently simmer until fragrant—a mere minute should suffice—but don’t rush this step; patience pays off big time here since letting aromas meld elevates final results exponentially! Afterward remove saucepan from heat then drizzle in luscious olive oil slowly whilst whisking furiously again—the goal being emulsion achieved—you’ll know you’ve succeeded once dressing appears slightly thickened yet still pourable!
Step 2: Embracing Freshness
While letting dressed cool momentarily (we want warm but not scorching), grab your large mixing bowl alongside shredded cabbage & carrot medley prepped earlier—assembling these beauties signals we’re close towards achieving crunchy perfection! Toss them gently using hands or spatula until evenly combined—it feels like giving veggies some much-needed love before drenching them lovingly under glorious vinaigrette shortly thereafter!
Step 3: Marrying Flavors
Now comes perhaps one of my favorite moments—the actual mingling process where flavors marry harmoniously together so beautifully within bowl! Drizzle cooled down vinaigrette over top heaps o’ shredded goodness then toss lightly again ensuring every shred gets coated evenly—this part’s crucial folks because nothing’s worse than unevenly dressed slaw leaving some bites too sour whilst others bland!
Step 4: Rest & Reflect
Once you’ve accomplished tossing duties successfully place lid atop mixing bowl then transfer entire ensemble into refrigerator allowing flavors meld overnight ideally—but even just two hours proves beneficial too if pressed on time! Allowing chilled time serves multiple purposes—not only does it enhance complexity but also softens crunchy textures ever so slightly creating mouthwatering balance between crispness tenderness alike…
Are you feeling excited yet? Because I sure am—and trust me once everyone tastes what you’ve created they’ll be clamoring back for seconds guaranteed!
Step 5: Creating the Perfect Balance of Flavors
Now that your dressing has simmered to perfection and the sugar has dissolved beautifully into that tangy cider vinegar, it’s time to bring everything together in a glorious marriage of flavors. In a large bowl, take your freshly shredded cabbage and peeled carrots, which should be vibrant and crunchy—this is crucial because we want a texture that will hold up against the tangy dressing and not turn soggy. Toss them gently with your warm dressing. This step is so vital because the warmth of the dressing helps to slightly wilt the cabbage, making it more tender while simultaneously allowing it to absorb all those incredible flavors. You should see the colors meld and the vegetables glisten with that luscious dressing; it’s like a visual feast!
As you mix, don’t rush this step! Take your time to ensure every piece of cabbage and carrot is evenly coated. It’s in this moment that you really start to feel the magic of The Best Vinegar Based Coleslaw come alive. The sweet notes from the sugar will counterbalance the acidity of the vinegar, while the celery seeds will infuse a subtle earthiness that’s utterly intoxicating. Trust me on this—if you take a minute to taste-test at this point, you’ll be amazed at how these simple ingredients transform into something truly extraordinary.
Step 6: The Power of Patience—Chilling Time
Once everything’s mixed together, it’s time for one of my favorite—and often overlooked—steps: chilling! Cover your coleslaw with plastic wrap or transfer it into an airtight container and place it in the refrigerator for at least two hours, though I urge you to leave it overnight if you can muster that level of patience. Why chill? Well, during this resting period, all those bold flavors will marry and deepen; think of it as letting your coleslaw take a little vacation where all those vibrant tastes get to mingle without interruption.
I promise you that taking this extra time will lead to an utterly profound transformation in flavor! The cabbage will soften just enough but still retain its satisfying crunch. When you finally pull it out of the fridge, you’ll experience an explosion of taste—a symphony of sweet and savory notes dancing on your palate! This step is absolutely paramount; rushing through it could mean missing out on that rich depth that makes this coleslaw stand out at any gathering.
Step 7: Adjusting Seasonings Like a Pro
After your coleslaw has had some quality chill time, it’s time for perhaps my favorite part—the taste test! Grab a fork and dig in; as you do, pay attention to what your taste buds are telling you. Depending on personal preference or even variations in ingredients (like different brands of vinegar), you might find that you want to tweak things just a bit more. Maybe it needs an extra pinch of salt or perhaps another dash of pepper to kick things up a notch? Don’t hesitate here; you’re crafting something wholly unique!
If you’re feeling adventurous (and I encourage you to be!), consider adding other elements like finely chopped green onions for a bit more crunch or even some diced bell peppers for color and sweetness. Remember, cooking is about personalization; it’s where your creativity shines through. Don’t forget that each adjustment should be made gradually—taste after each addition so that you can hone in on what feels right for you. Every bite should sing with flavor!
Step 8: Serving Up Your Masterpiece
Now comes one of my favorite moments—the grand reveal! Once you’ve adjusted your seasonings and everything tastes just right, it’s time to serve up this stunning creation. I love presenting my The Best Vinegar Based Coleslaw in a beautiful serving bowl where its vibrant colors can shine. Picture yourself scooping generous portions onto plates next to smoky barbecue ribs or heaping mounds on top of pulled chicken sandwiches—the visual alone is mouthwatering!
As you’re serving, remember how versatile this coleslaw is—it can stand alone as a refreshing side dish or become the star topping on sandwiches for an unforgettable crunch amidst tender meat layers. If you’re planning on serving it later in a gathering setting, consider keeping some additional dressing nearby; sometimes those flavors can intensify even further over time and having extra on hand allows folks to indulge as they please. I can’t stress enough how satisfying it feels when friends gather around the table with plates piled high and smiles wide—it’s moments like these that remind us why we cook!
Final Touches: Enjoying Every Bite
As you’re enjoying The Best Vinegar Based Coleslaw alongside your favorite dishes, take a moment to appreciate not only the wonderful flavors but also how food brings people together. Whether it’s at backyard barbecues or cozy dinners with loved ones, sharing meals creates connections that linger long after dessert is served.
I hope every bite transports you back to those cherished moments around family tables filled with laughter and love—a reminder that great food doesn’t just nourish our bodies; it feeds our souls too. So go ahead, make this coleslaw your own with every tweak and twist along the way—you’ll soon find yourself sharing this recipe again and again because trust me when I say, once you’ve tasted true coleslaw bliss, there’s no turning back! Enjoy every crisp bite—you’ve earned it!
Storage and Enjoyment Tips for Your The Best Vinegar Based Coleslaw
Now that you’ve whipped up a vibrant bowl of The Best Vinegar Based Coleslaw, it’s time to bask in the glory of your creation! This isn’t just a side dish; it’s a burst of flavor and crunch that will elevate any meal. As you get ready to dig in, let’s chat about how to keep this delightful coleslaw fresh and ready for your next culinary adventure. Trust me, you’ll want to savor every last bit!
Storing Leftover The Best Vinegar Based Coleslaw
When it comes to storing your leftover coleslaw, the key is choosing the right container. Opt for an airtight glass or plastic container—this not only helps preserve the crispness of the cabbage but also prevents any unwanted odors from mingling with other foods in your fridge. If you’re planning to enjoy this tangy delight within three to five days, you’re in luck; it holds up beautifully during that time! To ensure maximum freshness, I recommend placing a slice of bread in the container alongside your coleslaw; it absorbs excess moisture, keeping everything perfectly crunchy. You might be wondering how it tastes after storage—well, I promise you, those flavors meld together in a truly magical way, making every bite even more delicious than before! Just give it a gentle toss before serving again; no need for reheating since this dish shines cold.
Freezing The Best Vinegar Based Coleslaw for Later
If you find yourself with an abundance of coleslaw or simply want to prepare ahead, freezing is an excellent option! To freeze properly, pack individual portions of coleslaw into freezer-safe bags or containers—make sure to squeeze out as much air as possible to prevent freezer burn. It will keep well for about three months in the freezer. When you’re ready to use it, simply transfer it from the freezer to the fridge and let it thaw overnight. This makes for such convenient meal prep! Imagine pulling out a vibrant portion on a busy day—just mix it up with some extra seasoning if needed and serve alongside grilled veggies or sandwiches. Isn’t that just wonderful? The convenience factor makes meal planning so much easier!
With these tips at hand, you’ll be able to enjoy your delicious coleslaw long after it’s made, ensuring that each bite brings that same enthusiasm and joy as when you first prepared it.
The Best Vinegar Based Coleslaw

Experience bold flavors with The Best Vinegar Based Coleslaw—a refreshing side dish perfect for picnics and barbecues. Try it today!
- Prep Time: 15 minutes
- Cook Time: 5 minutes
- Total Time: 20 minutes
- Yield: Serves approximately 6
- Category: Side Dish
- Method: Mixing
- Cuisine: American
Ingredients
- 1/2 cup cider vinegar
- 1/2 cup sugar
- 1 teaspoon celery seed
- 1 teaspoon salt
- 1/2 teaspoon black pepper
- 1/4 cup olive oil
- 1 small head of green cabbage (about 2 pounds), shredded
- 2 medium carrots, peeled and shredded
Instructions
- In a small saucepan over medium heat, combine cider vinegar, sugar, celery seed, salt, and black pepper. Whisk until the sugar dissolves and the mixture is fragrant.
- Slowly drizzle in olive oil while whisking to emulsify the dressing.
- In a large mixing bowl, combine shredded cabbage and carrots. Pour the dressing over the vegetables and toss until evenly coated.
- Cover and refrigerate for at least two hours or preferably overnight for maximum flavor melding.
- Before serving, taste and adjust seasonings if needed.
Nutrition
- Serving Size: 1 cup (150g)
- Calories: 130
- Sugar: 11g
- Sodium: 280mg
- Fat: 7g
- Saturated Fat: 1g
- Unsaturated Fat: 6g
- Trans Fat: 0g
- Carbohydrates: 17g
- Fiber: 3g
- Protein: 1g
- Cholesterol: 0mg